Advanced Global Intercompany Setup – Part 3
Login to Intercompany Super user responsibility assigned to our user. The First step is defining organizations. These are the organizations which will be used by AGIS
Navigation: Intercompany Super user>>Setup>> Organization

Define Organization as shown below.

Similarly create organization for Japan legal entity also. And Query the same in organization form for confirming your creation. Note that in the above Screen while creating organization select ‘Yes’ for enabled column. This flag indicates that this organization is enabled for intercompany transactions. Without this processing of transactions in those organizations, through AGIS is not possible

Next Step is to security definition. Security is defined as, which user/person will have access to which and how many intercompany organizations
Navigation: Intercompany Super User>>Setup>>security
Query the Person name and the Respective organization on which the person should be given access. And enable “Yes” for the options as shown below

In the same way shown above give access for BCR_S to Singapore Org. and BCR_J to Japan Org.
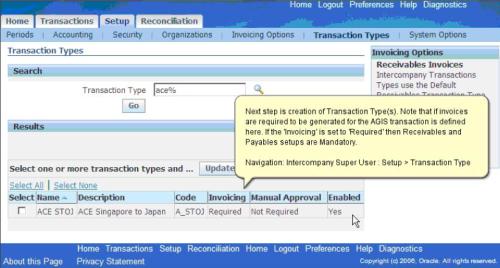
Next set is to define Transaction types in AGIS.
Your transaction type will decide whether invoicing is required for the transaction and manual approval is required.
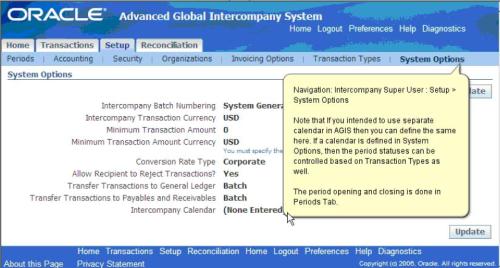
Our next step inthe process is to define AGIS system options
Next we will define invoicing options
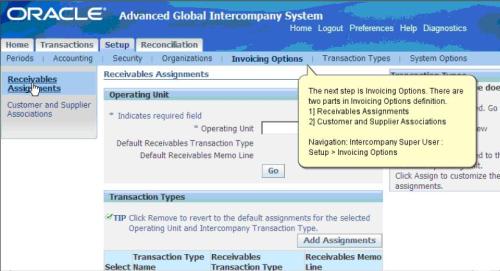
Under invoicing option Define Receivable Assignment and Customer/Supplier association as shown in the below screen shots
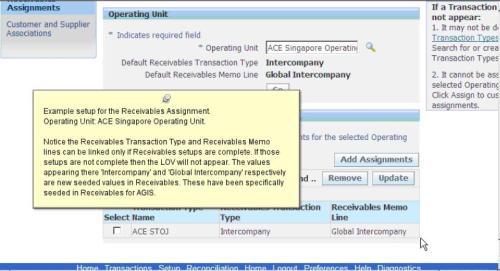
Example setup of one of the operating unit is shown in figure.
Note that Receivables Transaction Type and Receivables Memo lines can be linked only id Receivable setups are complete.If those setups are not complete then trhe LOV will not appear.The values like “Intercompany” , “Global Intercompany” respectively are seeded values in Receivables. These have been specifically seeded in Receivables for AGIS

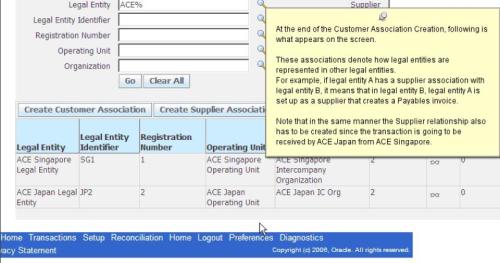
In the above step definition of Customer/ Supplier Association is done.There are two tabs in the setup.
1.Customer/Supplier association tab to define the Association
2.Trading partner tab to reviewthe earlier Created association.
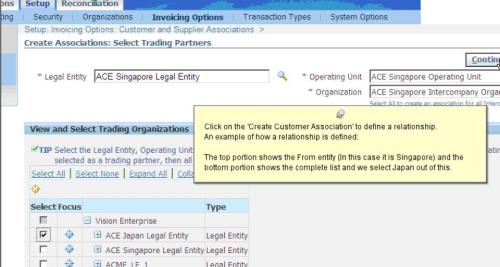

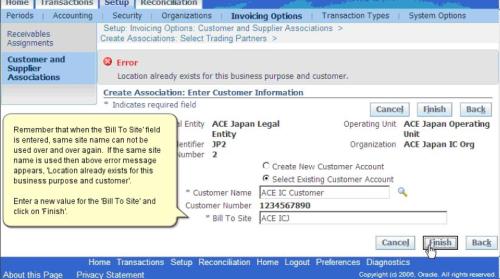
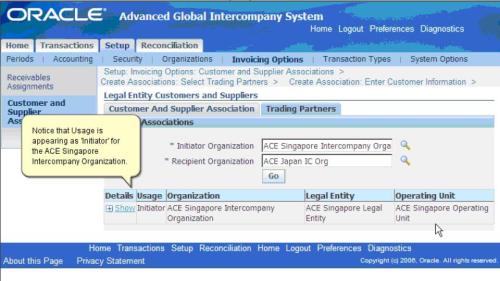
The second step in the creation of customer supplier association is selection of customer and entering a “Bill To Site” for the customer
Note that both are mandatory.
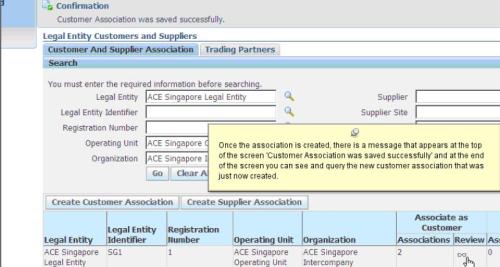
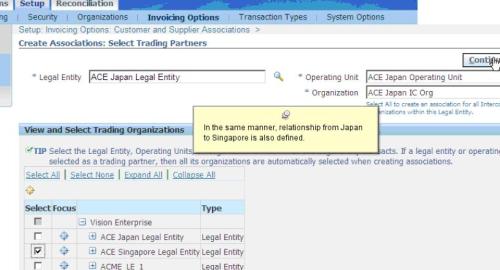

With this we have completed AGIS setup required for processing AGIS transactions We will discuss on AGIS Transaction process in the next part.
No comments:
Post a Comment